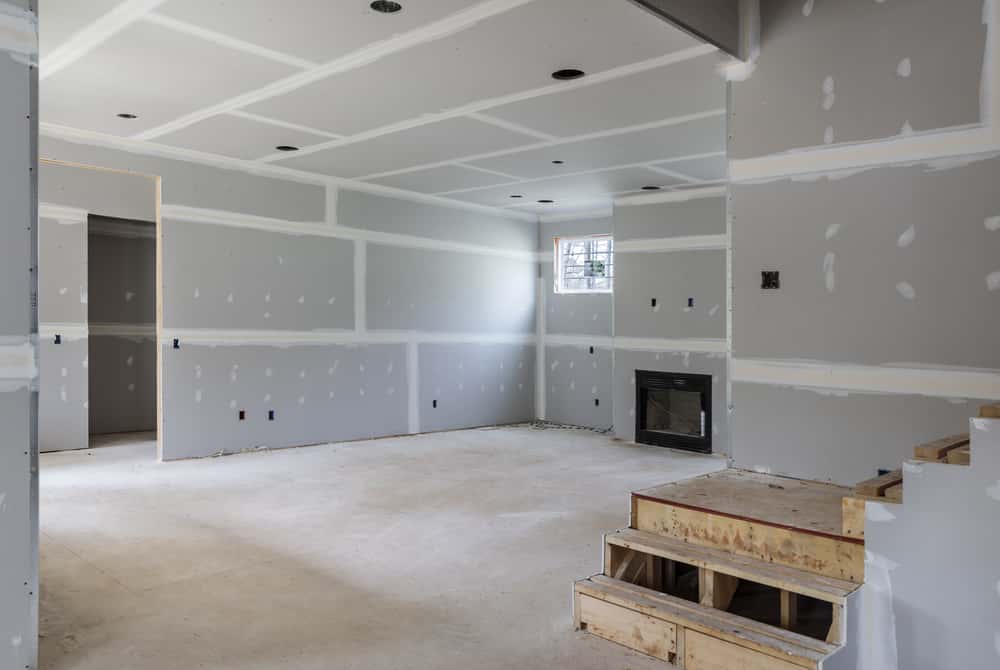
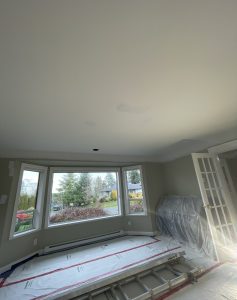
Drywall installation is a foundational skill in home construction and renovation, playing a critical role in the overall aesthetics and functionality of any space. Whether you’re tackling a new build, an addition, or a remodel, understanding the intricacies of drywall installation, taping, and finishing is key to achieving a smooth, professional finish. This comprehensive guide will walk you through each step of the process, offering insights, tips, and best practices that can make the difference between a mediocre result and a flawless finish.
1. Understanding the Basics of Drywall Installation:
Drywall, also known as gypsum board or plasterboard, is a widely used material for constructing interior walls and ceilings. Its popularity stems from its affordability, ease of installation, and versatility. However, proper drywall installation is more than just screwing panels into place—it requires careful planning, precise execution, and attention to detail.
Choosing the Right Drywall:
Before you begin, it’s essential to select the appropriate type of drywall for your specific project. There are several types available, each designed for different environments and purposes:
- Standard Drywall: This is the most common type, suitable for most interior walls and ceilings.
- Moisture-Resistant Drywall: Often referred to as “green board,” this type is ideal for areas with high humidity, such as bathrooms and basements.
- Fire-Resistant Drywall: Also known as Type X drywall, it’s thicker and more resistant to fire, making it a good choice for garages, utility rooms, and walls separating living spaces from attached garages.
- Soundproof Drywall: Designed to reduce noise transmission, this type is ideal for media rooms, bedrooms, and multi-family housing.
Planning and Preparation:
Successful drywall installation begins with thorough planning. Measure the space accurately to determine the number of drywall sheets you’ll need. It’s essential to minimize seams and joints, as they can be weak points prone to cracking and visible imperfections. Cutting drywall sheets to fit the space precisely is crucial—make sure to use a sharp utility knife and straight edge to achieve clean cuts.
Before you begin hanging drywall, ensure that the framing (studs and ceiling joists) is even and properly spaced. In most cases, studs are spaced 16 inches apart on center, but always double-check, as this will affect how you hang the drywall sheets.
Hanging Drywall:
When it comes to hanging drywall, the order of installation is important. Start with the ceiling, as this will support the upper edges of the wall panels and ensure a tight fit. Next, move on to the walls, starting from the top and working your way down. It’s crucial to stagger the seams between sheets to avoid creating weak points—this means that the seams on one row of drywall should not align with the seams on the adjacent row.
Use drywall screws or nails to attach the sheets to the framing, ensuring that fasteners are driven just below the surface of the drywall without breaking through the paper. Screws are generally preferred over nails, as they are less likely to pop over time. Fasten the drywall every 12 to 16 inches along the studs, and be sure to leave a small gap between the sheets and the floor to accommodate any future settling or shifting of the building.
2. The Art of Drywall Taping:
Taping is where the drywall installation process begins to take shape and prepares the surface for finishing. The goal of taping is to create a smooth, seamless surface by covering the joints between drywall sheets, filling gaps, and reinforcing the structure.
Choosing the Right Tape:
There are two primary types of drywall tape: paper tape and mesh tape. Each has its advantages and specific use cases:
- Paper Tape: The most common choice, paper tape is strong, flexible, and easy to use. It works well for most joints and corners. However, it requires a bit more skill to apply, as it can wrinkle or bubble if not properly embedded in the joint compound.
- Mesh Tape: Made of fiberglass, mesh tape is self-adhesive and easier to work with, especially for beginners. It’s particularly useful for repairing cracks and patching small holes. However, it doesn’t provide as smooth a finish as paper tape and is more prone to cracking over time.
Applying the First Coat:
Start by applying a layer of joint compound, also known as “mud,” over the seams. Use a 4-6 inch drywall knife to spread a thin coat of compound along the joint. The goal is to fill the gap between the sheets and provide a bed for the tape.
Next, apply the tape over the compound, pressing it firmly into place with the knife to remove any air bubbles. Be sure to overlap the tape at the corners, where two sheets meet. Once the tape is in place, apply a second thin layer of joint compound over the tape, feathering the edges to blend it with the surrounding drywall. This helps to create a smooth transition between the taped area and the drywall surface.
Taping Inside and Outside Corners:
Inside corners, where two walls meet, can be tricky. For these areas, fold the paper tape in half lengthwise before applying it to the joint. Use a corner trowel or your drywall knife to smooth the tape into the corner, ensuring that it is fully embedded in the compound.
For outside corners, use metal or plastic corner bead to protect the edges from damage. Attach the corner bead with drywall nails or screws, then apply joint compound over the bead, feathering it out to blend with the drywall surface. It may take several coats to achieve a smooth finish on outside corners.
3. Finishing Drywall Like a Pro:
Finishing drywall involves applying additional coats of joint compound to the taped seams, covering fasteners, and sanding the surface to create a uniform finish. This step is crucial for achieving a flawless appearance and preparing the walls for paint or wallpaper.
Building Up the Surface:
After the first coat of joint compound has dried, typically overnight, you’ll need to apply a second coat. This coat should be wider than the first, extending several inches beyond the edges of the tape to further feather the seam into the drywall. Use a wider drywall knife (8-10 inches) for this step, applying a thin, even layer of compound and smoothing out any imperfections.
Repeat this process for a third coat if necessary, especially on inside and outside corners. The goal is to create a gradual, smooth transition from the seam to the surrounding drywall, so the joint is virtually invisible.
Sanding for a Smooth Finish:
Once the final coat of joint compound is dry, it’s time to sand the surface to perfection. Use a fine-grit sandpaper (120-150 grit) or a sanding sponge to smooth out any rough spots, high points, or ridges in the compound. Be careful not to sand too much, as this can damage the drywall paper or expose the tape underneath.
Sanding is a dusty process, so be sure to wear a dust mask and protective eyewear. Additionally, it’s a good idea to cover nearby furniture and flooring to protect them from dust. After sanding, wipe down the walls with a damp cloth to remove any dust before painting or applying texture.
4. Common Challenges in Drywall Installation, Taping, and Finishing:
Even with careful planning and execution, drywall installation can present several challenges. Here are some common issues you may encounter, along with tips on how to overcome them:
Uneven Surfaces: If the framing is not level, the drywall may bulge or dip in certain areas. To fix this, you can use shims to even out the studs before hanging the drywall. If the drywall is already installed, you may need to apply extra joint compound to fill in low spots and sand down high spots.
Bubbling or Cracking Tape: Bubbling occurs when the tape is not properly embedded in the joint compound, while cracking can result from insufficient compound or movement in the wall. To fix these issues, cut out the affected area, apply a fresh coat of compound, and re-tape.
Over-Sanding: Sanding too much can damage the drywall paper or expose the tape. To avoid this, sand lightly and check your progress frequently. If you do accidentally sand too much, apply a thin coat of joint compound to repair the damage and re-sand after it dries.
Popped Fasteners: Occasionally, screws or nails may pop out of the drywall, creating visible bumps. This can happen if the framing moves or the fasteners were not properly set. To fix this, remove the popped fastener, re-drive it deeper into the stud, and cover it with joint compound.
5. Why Professional Drywall Installation Matters:
While drywall installation may seem like a task suited for DIY enthusiasts, there are several reasons why hiring a professional is often the best choice, especially for larger or more complex projects.
Expertise and Experience:
Professional drywall installers bring years of experience and specialized knowledge to the table. They understand the intricacies of working with different types of drywall, the best techniques for taping and finishing, and how to overcome challenges that might arise during installation. Their expertise ensures that the job is done correctly the first time, reducing the risk of future issues like cracking, uneven surfaces, or visible seams.
Efficiency and Precision:
Professionals have the tools and skills to complete drywall installation quickly and efficiently. They know how to measure, cut, and hang drywall with precision, minimizing waste and ensuring a seamless fit. This efficiency can be particularly valuable in large projects, where time is of the essence.
Quality Finish:
The final appearance of your walls is heavily influenced by the quality of the taping and finishing work. Professionals have the experience to achieve a smooth, flawless finish that is ready for painting or wallpapering. Their attention to detail ensures that there are no visible seams, bumps, or imperfections, giving your walls a polished, professional look.
Long-Term Value:
Investing in professional drywall installation can save you money in the long run. Properly installed drywall is less likely to develop problems such as cracks, popped fasteners, or uneven surfaces, reducing the need for costly repairs down the line. Additionally, a high-quality finish can enhance the overall value of your home, making it more attractive to potential buyers.
Conclusion:
Drywall installation, taping, and finishing are essential steps in any home renovation or construction project. While it may be tempting to tackle these tasks on your own, the expertise and precision offered by professional drywall installers can make a significant difference in the final result. By understanding the process and recognizing the value of professional work, you can ensure that your walls not only look great but also stand the test of time.
Whether you’re building a new room, remodeling a space, or simply repairing damaged walls, mastering the art of drywall installation is a valuable skill. And when in doubt, don’t hesitate to call in the professionals—your home deserves the best.

