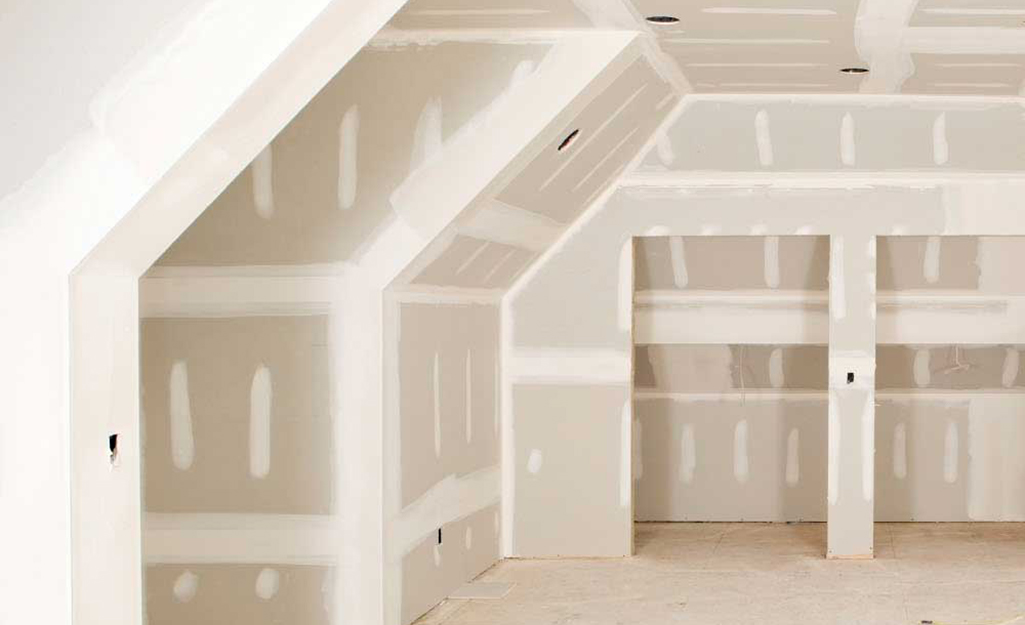
When it comes to home improvement, drywall installation is one of the most critical steps in creating a polished, professional look. Achieving the finest finish requires a blend of skill, patience, and attention to detail. Whether you’re a seasoned contractor or a DIY enthusiast, understanding the nuances of drywall installation can make a significant difference in the outcome of your project. This guide will take you through every stage of the process, from preparation to the final touches, ensuring that your walls are smooth, seamless, and ready for painting.
1. Planning and Preparation: The Foundation of a Flawless Finish
Before you even lift a sheet of drywall, proper planning is essential. A well-thought-out plan not only saves time but also prevents common mistakes that can compromise the quality of the finish. Begin by assessing the space where the drywall will be installed. Measure the height and width of the walls and ceilings to determine the number of drywall sheets you’ll need. Remember to account for doors, windows, and other openings that will require precise cuts.
Choose high-quality drywall sheets that are appropriate for your project. Standard drywall is typically 1/2-inch thick and works well for most interior walls and ceilings. However, consider using 5/8-inch drywall for areas where extra soundproofing or fire resistance is needed. Moisture-resistant drywall is a must for bathrooms, kitchens, and basements where humidity levels are higher.
Gather all necessary tools and materials before starting. This includes drywall sheets, joint compound, joint tape, taping knives, a utility knife, a drywall saw, a sanding block, screws or nails, a drywall screw gun, and a T-square. Having everything on hand will make the installation process more efficient and reduce interruptions.
2. The Installation Process: Setting the Stage for a Perfect Finish
The installation of drywall is where the project begins to take shape. Start by marking the studs on the floor and ceiling to guide the placement of the drywall sheets. This will ensure that the sheets are properly anchored to the framing. When cutting drywall, use a T-square and a utility knife to score the surface, then snap the sheet along the scored line for a clean break. If you’re working with a large room, it’s often best to hang the drywall on the ceiling first, followed by the walls.
Begin attaching the drywall sheets to the studs using screws or nails. Screws are generally preferred because they provide a stronger hold and are less likely to pop out over time. Place screws about 16 inches apart along the studs, and ensure they are sunk just below the surface of the drywall without breaking the paper facing. This creates a slight indentation that can be filled with joint compound later.
When installing drywall, it’s important to leave a small gap (about 1/8 inch) between the sheets to allow for expansion and contraction due to changes in temperature and humidity. These gaps will be covered during the taping and mudding process, but leaving them ensures that your drywall won’t crack or buckle over time.
Corners and edges require special attention. For outside corners, use metal corner beads to protect the drywall and create a crisp, clean edge. These beads are attached with nails or screws and then covered with joint compound during the finishing process.
3. Taping and Mudding: Creating a Seamless Surface
Taping and mudding are critical steps in achieving a smooth, professional finish. The goal is to hide the seams between drywall sheets and create a surface that looks like a single, continuous plane. This process requires patience and practice to master.
Start by applying joint tape over the seams. Paper tape is commonly used because it creates a strong bond and resists cracking. However, fiberglass mesh tape is also an option, especially for areas prone to movement, such as ceilings. Apply a thin layer of joint compound, also known as mud, over the tape using a taping knife. The first coat should be just enough to cover the tape and fill any gaps, but not so thick that it creates ridges.
Allow the first coat of joint compound to dry completely before applying a second coat. Drying times can vary depending on the type of compound used and the humidity levels in your workspace. For most joint compounds, 24 hours is sufficient. The second coat should be slightly wider than the first, feathering out the edges to create a gradual transition between the drywall and the seams. This helps to hide the tape and blend the seams into the surrounding wall.
After the second coat dries, apply a third and final coat of joint compound. This coat should be even wider, extending several inches beyond the previous coats. Use long, smooth strokes with the taping knife to create a flawless surface. Once the final coat is dry, inspect the seams for any imperfections or air bubbles, and touch up as needed.
4. Sanding: The Key to a Perfectly Smooth Finish
Sanding is the step that takes your drywall project from good to great. It’s essential for removing any ridges, bumps, or imperfections left behind by the joint compound. However, sanding must be done carefully to avoid damaging the drywall or creating divots that will show through the paint.
Start with a fine-grit sanding block or sandpaper, around 120 to 150 grit. Sand lightly over the seams and edges, focusing on areas where the joint compound is thicker. Use a bright work light or shine a flashlight parallel to the wall to highlight any imperfections as you sand. This will help you see shadows cast by bumps or ridges that need to be smoothed out.
To avoid over-sanding, use a light touch and check your progress frequently. It’s better to sand multiple times lightly than to try to remove too much material at once. For inside corners, use a corner sanding tool to ensure a crisp, clean finish.
Sanding creates a significant amount of dust, so proper ventilation is important. Open windows and use fans to circulate air, and wear a dust mask or respirator to protect your lungs. After sanding, wipe down the walls with a damp sponge or cloth to remove any remaining dust before priming.
5. Skim Coating: Achieving an Ultra-Smooth Finish
For those seeking perfection, a skim coat is the final step in achieving the finest drywall finish. A skim coat is a thin layer of joint compound applied over the entire surface of the drywall to create an ultra-smooth finish. This step is especially important if you’re working with older walls that have been patched or if you’re aiming for a high-end, modern look.
To apply a skim coat, use a wide trowel or a specialty skimming blade. Spread a thin layer of joint compound over the entire wall, working in sections. The goal is to fill in any small imperfections and create a uniform surface. After the skim coat dries, sand lightly to achieve a perfectly smooth finish. This step can be repeated if necessary to address any remaining imperfections.
6. Priming and Painting: Bringing Your Walls to Life
With your drywall now perfectly smooth, it’s time to prime and paint. Priming is a crucial step that prepares the drywall for paint, seals the surface, and helps the paint adhere better. Choose a high-quality drywall primer and apply it evenly using a roller. Be sure to cover the entire surface, including corners and edges. Allow the primer to dry completely before painting.
When it comes to painting, use a high-quality paint that suits the room’s purpose. For living rooms and bedrooms, a matte or eggshell finish provides a soft, elegant look. In kitchens and bathrooms, a semi-gloss or satin finish is more durable and easier to clean. Apply the paint in even, overlapping strokes, starting from the top and working your way down. Two coats of paint are usually necessary for a rich, even color.
Conclusion: The Art of Drywall Installation
Achieving the finest finish in drywall installation is a process that demands attention to detail, patience, and the right techniques. From careful planning and precise installation to meticulous taping, mudding, sanding, and painting, each step builds on the last to create a wall that is smooth, seamless, and visually stunning. Whether you’re working on a small renovation or a large-scale construction project, mastering these techniques will ensure that your drywall installation is of the highest quality, adding value and beauty to your home.


