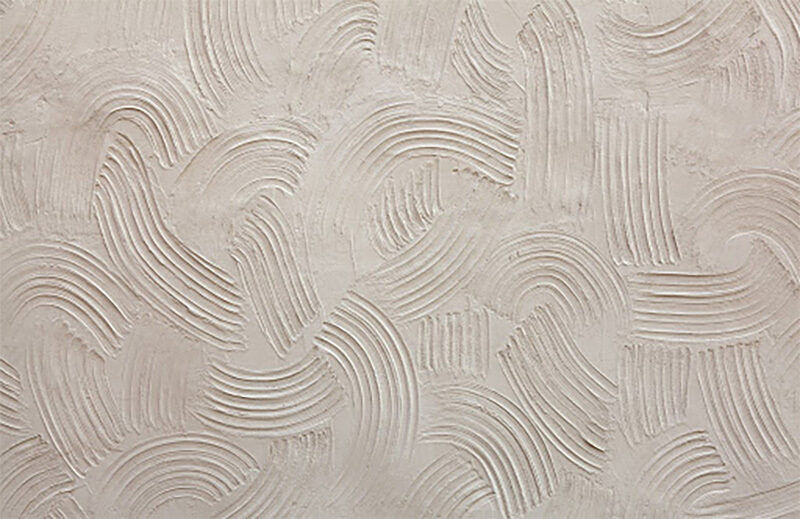
Drywall texture is a popular choice for adding visual interest and dimension to interior walls and ceilings. However, trends and preferences change over time, and what was once considered stylish may now be outdated or undesirable. Whether you’re renovating a home or simply looking to update your living space, knowing how to remove different types of drywall texture is essential for achieving a fresh, modern look. In this comprehensive guide, we’ll explore the most common types of drywall texture and provide expert tips on how to remove them safely and efficiently.
1. Popcorn Ceiling Texture: Popcorn ceiling texture, also known as acoustic or cottage cheese texture, was a popular choice in mid-century homes for its sound-dampening properties and ability to hide imperfections. However, its rough, bumpy surface has fallen out of favor in modern design trends. Removing popcorn texture involves careful scraping and often requires moisture to soften the material before removal. Here’s a step-by-step process for safely eliminating popcorn texture:
- Begin by preparing the room for the removal process. Cover floors and furniture with plastic sheeting to protect them from dust and debris.
- Use a garden sprayer to mist the popcorn texture with water. Allow the water to penetrate the material for several minutes, softening it and making it easier to remove.
- Using a wide drywall knife or a specialized popcorn ceiling scraper, gently scrape away the texture, taking care not to damage the underlying drywall.
- Work in small sections, gradually removing the texture until the entire ceiling is smooth.
- Once the texture is removed, inspect the ceiling for any remaining imperfections or damage. Repair any cracks or holes with drywall compound, sanding the surface smooth before proceeding with painting or other finishes.
2. Orange Peel Texture: Orange peel texture is characterized by its subtle, pebbled appearance, resembling the skin of an orange. While less challenging to remove than popcorn texture, it still requires precision and the right tools to achieve a smooth result. Here’s how to remove orange peel texture effectively:
- Start by protecting the surrounding area with drop cloths or plastic sheeting to minimize mess.
- Use a drywall sander or sanding sponge to smooth down the texture, being careful not to sand too aggressively and damage the underlying drywall.
- After sanding, wipe down the walls with a damp cloth to remove dust and debris.
- Inspect the walls for any remaining texture or imperfections. If necessary, apply a thin layer of joint compound to fill in any gaps or uneven areas.
- Once the walls are smooth and free of texture, they’re ready for painting or other finishes.
3. Knockdown Texture: Knockdown texture, also known as skip trowel or Spanish lace, features a textured surface with flattened peaks created by troweling or spraying drywall mud onto the wall and then lightly knocking it down with a trowel or other tool. Removing knockdown texture involves a combination of scraping, sanding, and patching to restore the wall to a flat finish. Here’s how to remove knockdown texture effectively:
- Start by scraping away any loose or high spots in the texture using a drywall knife or putty knife.
- Use a drywall sander with a medium-grit sandpaper to smooth down the remaining texture, working in small sections until the entire wall is smooth.
- After sanding, inspect the walls for any remaining imperfections or damage. Fill in any holes or cracks with joint compound, smoothing the surface with a drywall knife or sanding block.
- Once the walls are smooth and free of texture, they’re ready for painting or other finishes.
4. Swirl Texture: Swirl texture adds visual interest to walls with its elegant, swirling patterns. However, if you’re looking for a smooth, modern aesthetic, removing swirl texture may be necessary. Here’s how to remove swirl texture effectively:
- Start by scoring the texture with a utility knife to break up the pattern and create a rough surface for better adhesion.
- Use a drywall sander or sanding sponge to smooth down the texture, being careful not to sand too aggressively and damage the underlying drywall.
- After sanding, wipe down the walls with a damp cloth to remove dust and debris.
- Inspect the walls for any remaining texture or imperfections. If necessary, apply a thin layer of joint compound to fill in any gaps or uneven areas.
- Once the walls are smooth and free of texture, they’re ready for painting or other finishes.
5. Comb Texture: Comb texture, also known as stippled or slap brush texture, features a series of ridges or lines created by dragging a comb-like tool through wet drywall mud. While comb texture can add depth and character to walls, removing it requires patience and careful attention to detail. Here’s how to remove comb texture effectively:
- Start by spraying the texture with water to soften it and make it easier to remove.
- Use a drywall knife or putty knife to gently scrape away the texture, taking care not to damage the underlying drywall.
- After scraping, sand the walls with a drywall sander or sanding sponge to smooth down any remaining texture.
- Wipe down the walls with a damp cloth to remove dust and debris.
- Inspect the walls for any remaining imperfections or damage. Fill in any holes or cracks with joint compound, smoothing the surface with a drywall knife or sanding block.
- Once the walls are smooth and free of texture, they’re ready for painting or other finishes.
Conclusion: Removing drywall texture is a labor-intensive process that requires careful planning, the right tools, and proper safety precautions. By understanding the characteristics of different texture styles and employing the appropriate removal techniques, you can transform your walls or ceilings into smooth, flawless surfaces ready for painting or other finishes. Whether you’re tackling the project yourself or seeking professional assistance, this guide will equip you with the knowledge and confidence to achieve outstanding results.


